
September brought game-changing updates from HubSpot, empowering users with enhanced tools for efficiency and workflow streamlining.
📱 [Public Beta] Mobile Sales Email Thread Summarization [iOS only]
![[Public Beta] Mobile Sales Email Thread Summarization [iOS only]](https://www.growthoperationsfirm.com/hs-fs/hubfs/_public_beta__mobile_sales_email_thread_summarization__ios_only__720.jpg?width=720&height=398&name=_public_beta__mobile_sales_email_thread_summarization__ios_only__720.jpg)
What is it?
Thanks to AI, mobile sales reps can now quickly and easily gain the context on any given CRM email thread, and receive a full email thread summary within seconds.
Sales reps can now elevate their productivity game by quickly responding to emails from the HubSpot mobile app wherever, whenever.
Why does it matter?
High volumes of emails from different customers that sales reps have to manage every day means reps often have a great deal of context switching between customers and email threads.
When on the go, gaining the context to respond to the next customer or lead email thread is even more challenging given the time pressure sales reps are under to respond. Providing mobile sales reps with a tool to give them an instant bite-size summary puts them on track to quickly respond to the latest incoming email with little to no effort. Increasing your communications productivity has a direct impact on your overall productivity as a sales rep.
How does it work?
In the HubSpot mobile app open a contact’s record page and tap on an email engagement thread. At the top of the email body, you will find a “Generate Summary” button. Tapping on it will generate a full email summary of all emails in the thread. To keep this summary and have it readily available for all your team members to view, click on ‘Save’. The generated email thread summary will only be visible to you and your team members and will not be shared externally with your customer.
Note: When clicking Cancel or tapping on “Generate summary” if the summary was not saved, a new summary will be generated. Content Assistant generates a new summary every time it’s requested.
📊 [Public Beta] Gauge Visualizations in Custom Report Builder
![[Public Beta] Gauge Visualizations in Custom Report Builder](https://www.growthoperationsfirm.com/hs-fs/hubfs/_public_beta__hubspot_gauge_visualizations_in_custom_report_builder_720.jpg?width=720&height=398&name=_public_beta__hubspot_gauge_visualizations_in_custom_report_builder_720.jpg)
What is it?
The custom report builder now supports gauge visualizations. Gauges make it easy to understand how your data is performing compared to defined ranges!
Why does it matter?
Typical visualizations like lines, bars, and pies are great at displaying data when looking at trends or proportions but often are lacking when trying to determine how a metric is performing against a specific range. Gauges make it easy to understand if your metric is above or below where you want it to be.
At a glance, you can answer questions like "How close are we to meeting our quarterly sales target?", "How close are we to achieving our monthly lead generation target?", "How are we performing in terms of our target for customer satisfaction scores?", and many more!
How does it work?
Enter the Custom Report Builder and select the data type that will be in the gauge. Once on the editing screen, select "Gauge" from the list of chart options.
Once you've selected and picked the value you'd like to display, check Chart Settings to set the range and add bands.
There are some preset palettes that make it easy to set up a nice Red > Green or Green > Red in just five easy steps.
Dial in your bands to make the gauge fit exactly what is needed. Then save it to a dashboard!
💵 [Live] QR Codes for Payment Links
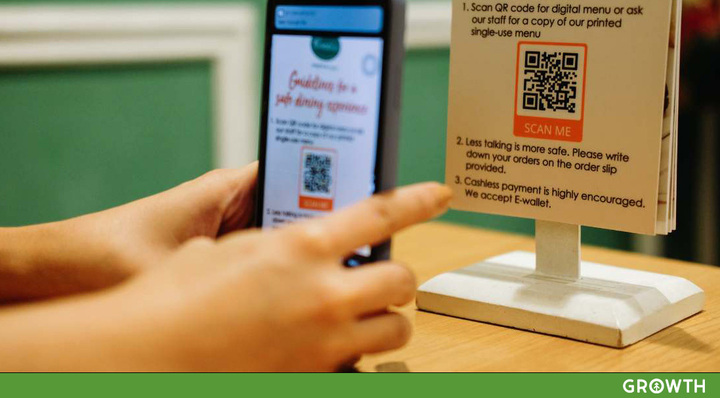
What is it?
Payment links now offer QR Codes out of the box. Generate a QR code and share it online or in-person to accept payments.
Why does it matter?
Make it easy for your customers to pay you for anything, anywhere. Have customers scan a QR code so they can easily pay. QR codes are great for sales at in-person events, at your business, or anywhere you want to make available to your customers.
How does it work?
A QR code can be easily created for any payment link. To get started:
- Create a payment link for any product or service you want to sell (Available under Sales > Payments > Payment Links)
- After saving, click Actions and select "View QR Code"
- Copy or download the QR Code and add it to wherever you want your customers to scan from
- Customers can use their phone camera to scan the code, and be taken directly to your checkout page
☎️ [Live] Sequences on Mobile [IOS and Android]
![[Live] Sequences on Mobile [IOS and Android]](https://www.growthoperationsfirm.com/hs-fs/hubfs/hubspot_sequences_on_mobile__ios_and_android__720.png?width=720&height=398&name=hubspot_sequences_on_mobile__ios_and_android__720.png)
What is it?
iOS and Android Apps will support enrolling, un-enrolling, pausing, and resuming contacts from a sequence.
Why does it matter?
Sequences are a key part of a sales rep's prospecting workflow - it is how you qualify leads and get them into your calendar as quickly and efficiently as possible. Being able to do this on mobile brings Sequences to the next level, untethering the prospecting sales rep from their desks.
Imagine meeting a prospective customer at a conference, scanning their business card on the Hubspot mobile app, and enrolling them into a sequence - all with a few taps.
This is automation on the go and we think our customers are going to love this update.
How does it work?
Once you update your iOS and Android mobile apps to the latest version, navigate to the contact record to see the ability to enroll that contact into a sequence.
- Tapping on enroll will allow you to pick from all of the sequences you have set up on your portal.
- Once a sequence is selected, you will be given a preview of the sequence along with important information such as any missing information you need to set, when the steps will be executed, the subject line of the emails, etc
- If a contact is already enrolled into a sequence, tapping on enroll will let you pause or unenroll.
🗣️ [Live] AI assistant: Create social posts in the blog editor
![[Live] AI assistant: Create social posts in the blog editor](https://www.growthoperationsfirm.com/hs-fs/hubfs/hubspot_ai_assistant_create_social_posts_in_the_blog_editor_720.jpg?width=720&height=398&name=hubspot_ai_assistant_create_social_posts_in_the_blog_editor_720.jpg)
What is it?
Now you can automatically generate social media copy directly from the blog post editor using AI, making it easier to share your blog content on social channels.
Why does it matter?
The current workflow to create social posts to promote blog content requires manual copywriting for each social media platform, which is time-consuming and error-prone. Additionally, the process of creating a social media copy after creating a blog post is not very intuitive.
How does it work?
Ensure auto-publishing is turned on in Settings.
In the new UI:
When the blog is in a publishable state in the blog post editor, there is a drop-down in the Publish/Update icon.
You will be able to view a Social icon and this will open the social composer side panel.
You can select a social media account and select the content assistant icon in the editor. You have the option to use an AI-generated copy based on your current blog content or enter your own prompt.
Recent posts